
Trek Overview
As a newer route, it is more remote and arguably more beautiful, but a bit longer and slightly more expensive. It starts on the western side of the mountain at the Londorossi Gate, which is a further drive from town, and was introduced as an alternative to the Shira route.
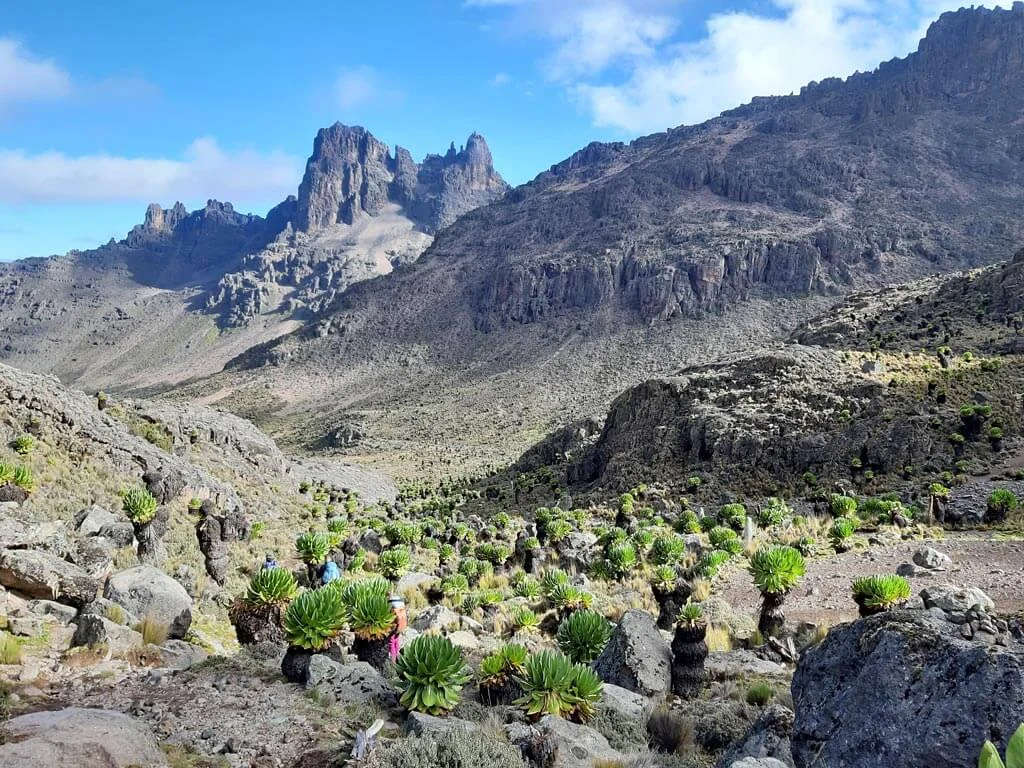
After beautiful forests and moorlands it crosses the Shira Plateau on day 3 to connect with the Machame Route at Lava Tower and down towards Barranco Valley via the Southern Circuit. You may be lucky enough to see buffalo, elephants, and other game. Because this route can be done over a longer period of time for acclimatization, it has a higher success rate of summiting.
Day-to-Day Itinerary
DAY 1: Londorossi Gate (2,250m) to Mti Mkubwa Camp (2,820m)
After breakfast, you’ll be driven from Moshi to Londorossi Gate for registration. The drive takes approximately 3 hours. After completing the registration process, you’ll begin your trek through the dense rainforest, where you may encounter Colobus monkeys and a variety of bird species. The trail ascends gradually, offering an introduction to Kilimanjaro’s rich biodiversity. Upon arrival at Mti Mkubwa Camp (Big Tree Camp), you’ll settle in for dinner and an overnight stay.
- Distance: 7 km (4.3 miles)
- Hiking Time: 3-4 hours
- Habitat: Rainforest
DAY 2: Mti Mkubwa Camp (2,820m) to Shira 1 Camp (3,610m)
Today’s trek starts with a steep climb out of the rainforest into the heather and moorland zone. The trail offers expansive views of the Shira Plateau and Mount Meru in the distance. As you trek across the Shira Plateau, you’ll pass through an ancient caldera and continue to Shira 1 Camp. Dinner and overnight stay at Shira 1 Camp.
- Distance: 8 km (5 miles)
- Hiking Time: 5-6 hours
- Habitat: Moorland
DAY 3: Shira 1 Camp (3,610m) to Shira 2 Camp (3,850m)
This is a relatively easy day as you continue your trek across the Shira Plateau towards Shira 2 Camp. The day is meant for acclimatization as you walk slowly, allowing your body to adjust to the altitude. You’ll have stunning views of the western breach and the volcanic formations. You’ll arrive at Shira 2 Camp in the early afternoon, giving you time to explore the surrounding area. Dinner and overnight at Shira 2 Camp.
- Distance: 7 km (4.3 miles)
- Hiking Time: 3-4 hours
- Habitat: Moorland
DAY 4: Shira 2 Camp (3,850m) to Barranco Camp (3,950m) via Lava Tower
Today is a challenging day with a significant altitude gain as you trek towards Lava Tower, a 4,630-meter-high volcanic rock formation. This day is crucial for acclimatization, as you will ascend high but sleep low. After reaching Lava Tower and taking a break for lunch, you’ll descend to Barranco Camp. The descent helps with acclimatization and prepares you for the upcoming challenges. Barranco Camp is situated in a valley below the Barranco Wall, where you’ll have—dinner and overnight at Barranco Camp.
- Distance: 10 km (6.2 miles)
- Hiking Time: 6-8 hours
- Habitat: Semi-desert
DAY 5: Barranco Camp (3,950m) to Karanga Camp (3,995m)
The day starts with the climb of the Barranco Wall, a steep and challenging rock wall that requires some scrambling. Although the wall may seem daunting, it is manageable and offers breathtaking views as you climb. After conquering the Barranco Wall, the trail takes you through a series of ridges and valleys, with occasional ascents and descents. The landscape becomes increasingly barren, with scattered boulders and views of the southern glaciers. You’ll reach Karanga Camp in the early afternoon, giving you time to rest and acclimatize—dinner and overnight at Karanga Camp.
- Distance: 5 km (3 miles)
- Hiking Time: 4-5 hours
- Habitat: Alpine Desert
DAY 6: Karanga Camp (3,995m) to Barafu Camp (4,673m)
The trail to Barafu Camp is a steady ascent over rocky and barren terrain, with little vegetation. As you approach Barafu Camp, the terrain becomes steeper and more rugged. The camp is located on a rocky ridge, with breathtaking views of Mawenzi Peak and the summit of Kibo. You’ll arrive at Barafu Camp in the early afternoon. This is your base camp for the summit attempt, so after an early dinner, you’ll rest and prepare for the final ascent.
- Distance: 4 km (2.5 miles)
- Hiking Time: 4-5 hours
- Habitat: Alpine Desert
DAY 7: Barafu Camp to Uhuru Peak (5,895m) to Mweka Camp (3,100m)
The summit attempt begins around midnight. With headlamps lighting the way, you’ll begin the challenging climb up steep scree and ice slopes. The climb to Stella Point is the most physically demanding part of the journey. Upon reaching Stella Point at sunrise, you’ll take a short rest and then continue along the crater rim to Uhuru Peak, the highest point on Kilimanjaro and in Africa. After celebrating at Uhuru Peak, you’ll descend back to Barafu Camp for a brief rest, and then continue the descent to Mweka Camp.
- Distance: 5 km (3 miles) ascent to Uhuru Peak + 12 km (7.5 miles) descent to Mweka Camp
- Hiking Time: 7-8 hours to the summit, 4-6 hours descent to Mweka Camp
- Habitat: Arctic to Rainforest
DAY 8: Mweka Camp (3,100m) to Mweka Gate (1,640m)
On the final day, you’ll continue descending through the rainforest to Mweka Gate. The trail is gentle and surrounded by the sounds and sights of the forest, a stark contrast to the barren summit. At Mweka Gate, you’ll complete park formalities and receive your summit certificates. After celebrating with your guides and porters, you’ll be driven back to Moshi, where you can enjoy a well-deserved rest.
- Distance: 10 km (6 miles)
- Hiking Time: 3-4 hours
- Habitat: Rainforest
Best Time to Use the Route
The best time to climb Kilimanjaro via the Lemosho route is during the dry seasons: late June to October (warmest/driest) and January to March (clear skies/colder). These months offer the best weather, highest summit success rates, and optimal visibility. Mid-June to October is generally considered the top choice for dry, stable, and warmer trekking conditions.
Route at a Glance
Trek Duration;
8 Days, 7 Nights
Scenery;
Excellent
Difficulty;
Medium
Traffic;
High
Route Highlights
- Highest summit success rate of all Kilimanjaro routes
- Pristine western forest slopes — very few trekkers
- Spectacular traverse of the full Shira Plateau (3,800m)
- Dramatic Barranco Wall crossing
- 8-day option provides the absolute best acclimatization profile
Detailed Breakdown
Trekking Cost Includes
- All entrance fees and Government Taxes
- Airport Transfers (upon Arrival and Departure)
- Clean, purified drinking water
- Fair wages for the mountain crew.
- All meals while on the Mountain
- Rescue Fees and all taxes.
- Salaries for Porters, Cook, and Guides
- Oxygen Tanks, Pulse Oximeter, and First Aid Kit
- Private cook speaking fluent English
- Private guide speaking fluent English
- Transfers from the Hotel to the Kilimanjaro entrance gate and from the Kilimanjaro exit gate to the hotel.
Trekking Cost Excludes
- Travel insurance
- Tips for guides, porters, and cooks.
- Accommodation on day of arrival and departure.
- Visas & vaccinations.
- Personal expenses eg. Laundry, beverages, etc.
- Bed, Sleeping Bag, and walking Poles.
- Private Toilet and hot shower tent.
- International flights (can be booked for you on request)
Inquiry Space
TRAVEL WITH DEO SAFARIS
#travelwithdeosafaris
Verified Fantastisk We went on a two-day safari. On the first day, we were in the national park and had an excellent guided tour by Am Abdallah and Muhidini. They were very knowledgeable, explained things well, and drove in a way that allowed us to see the animals up close. On the second day, we visited the Maasai people, where we received a very good introduction and learned about how they live. After that, we went on a boat safari, which was perfect for seeing the hippos up close. All in all, this was an amazing experience with excellent service.Posted on TripadvisorVerified An amazing two-day safari experience Thank you Abdullah for showing us around the national park and caring about us for almost full two days! Your knowledge about this and other places is fantastic and answers to our many questions are highly appreciated. And the team of you and the driver Muhidini was truly great, the experience we got exceeded our biggest expectations as we saw much more wild animals than we could dream of. Once again - thank you very much and we hope many more travellers will get a chance to be guided by you.Posted on TripadvisorVerified Es war ein Traum Hatte zwei unvergessliche Tage im Nyerere Nationalpark mit Travel with Deo Safari.Der Transfer verlief Reibungslos alles war perfekt durch Organisiert.Mein Guide Abdullah und Fahrer Mutideni begleiteten mich durch die Atemberaubende Natur und Tierwelt ,diese vielen Tiere aus der Nähe zusehen war ein Traum. Sie bereiteten ein Frühstück in der Wildnis am See vor.Mutideni hatte selbst gemachte Reiscaks ,die waren so lecker. Am Abend ging es in die Selous Safari Lodge,dort Empfang mich Maria herzlich . Bungalow waren riesig alles perfekt und Essen lecker. Nächsten Tag begrüßte mich Goodluk,wir besuchten ein Massai Dorf,mir wurde viel über das Leben der Massai erklärt und führten mich durch das Dorf.Es war sehr interessant,im Anschluss hatte ich eine Bootstour auf dem Rufiji Fluss mit einem erfahrenen jungen lokalen Guide,beobachten viele Vögel , Flusspferde und Krokodile.Ich kann diese zwei Tagestour von Travel with Deo Safari nur empfehlen ,sehr Erlebnis reich und entspannend ASANTE SANA ,Danke schön Abdullah,Mutideni und Goodluk Super erfahrene GuidesPosted on TripadvisorVerified Great experience Excellente experience en couple on recommande a fond ! Vu antilopes giraphes hippo buffles phacocheres éléphants lions leopard crocodiles Super guide super driverPosted on TripadvisorVerified Safari parc Nyerere Incroyable safari, nous avons eu beaucoup de chance et avons vu 4 des big 5 le parc n’ayant pas de rhinocéros, le chauffeur ainsi que le guide étaient géniaux très à l’écoute, ils nous ont donné pleins d’informations sur la faune et la flore c’était un chouette moment, Beaucoup moins fan du safari en bateau sur la rivière, mais le tour est très agréable et le guide toujours aussi accueillant et sympathique Le lodge est vraiment un très bel endroit, les chambres sont très spacieuses et la literie très confortablePosted on TripadvisorVerified Amazing. It was amazing. All transfers went very smootly. Our tourguide Goodluck did his very best to give us the best experience ever. Thank you.Posted on TripadvisorVerified Dit heeft al mijn verwachtingen overtroffen Ik heb vandaag echt een geweldige ervaring gehad. Alles was goed verzorgd. Ik werd super vriendelijk geholpen en alles was erg goed geregeld. Alle vragen die ik had waren binnen no time beantwoord en ze zijn erg flexibel. Ook is de prijs heel erg goed! De Safari was geweldig. Binnen 5 minuten na aankomst heb ik al leeuwen, olifanten en giraffen gezien. De tour was erg mooi en ik heb ontzettend veel gezien. Dit is iets was je echt gedaan moet hebben en door de hulp van travel with deo heb ik een goede prijs gehad en geen zorgen! Hakuna matata!Posted on TripadvisorVerified Experiencia inmejorable. Realmente es un viaje único; el parque tiene todo tipo de animales. Los vimos por tierra y por río. Ellos son superamables, y es una experiencia que no se olvida. Fantásticos. De 10.Posted on TripadvisorVerified WOOOOOOOWWW It was a dream! The organization was perfect, the driver, the guide and all the guys were soo kind and marvelous! I will surely do it again!Posted on TripadvisorVerified Heel mooie ervaring Een heel mooie daytrip naar mikumi national park gedaan. Ondanks de late aanvraag werd alles nog optijd in orde gebracht door Reinie. Heel erg bedankt daarvoor. De safari zelf was wonderbaarlijk. Heel mooie dieren gezien van kortbij. Ik ben blij dat ik mijn safari via travelwithdeo heb geboekt. Echt een aanrader!Posted on Tripadvisor
